Please Log In for full access to the web site.
Note that this link will take you to an external site (https://shimmer.mit.edu) to authenticate, and then you will be redirected back to this page.
In 6.205, we use the Vivado toolchain - a beautiful but complicated piece of software that comes with quite a few caveats:
- The install can range anywhere from 70 to 120GB...and that's before you try to build anything.
- It only runs natively on Windows and most Linux distributions (Mac is not natively supported)
- Even if you spin up a VM or dual-boot your Mac into Windows or Linux, it has no native build for ARM silicon or Apple Silicon Macs (M1, M1 Pro/Max/etc., M2, ...) though with emulation/rosetta/whatever you can kinda sorta get it to work, but it is a mess and not 100% stable.

Vivado is also a lot to take in and can be overwhelming. The learning curve can be pretty steep, the documentation can be a maze, the online forums are littered with five year old unresolved threads of people trying to figure things out, and if you're coming from a software engineering background with their fancy-schmancy all-inclusive IDEs with dark mode or whatever à la Jetbrains/VSCode, oh my sweet summer child, Vivado is going to be a surprise for you. This isn't even my opinion, this is just feedback we've received from students for years.

But, as the saying goes, "Perfect is the enemy of Good,"...or something. And Vivado is pretty good. A lot of complaints about using arise from relatively superficial parts of it, whereas the core of Vivado is very good...it is one of the industry standards right now and for good reason. It is very powerful and brings a lot to the table. Consequently, we want to let you use it while making things as easy as possible. Towards that end we're going to do it in a way that most "intro" courses don't do it. We're going to rely largely on scripting and avoid the Vivado GUI until we absolutely cannot (a good number of you will likely use it on final projects). At that point, you'll be mature enough and can see it for what it is. In doing this, we're trying to keep our class as platform-agnostic as possible while still letting you get some good development cycles in.
However we still need to get access to Vivado so, depending on your circumstances, we the course staff support three ways for you to use Vivado to do your labs:
- Option 1: Install Vivado on your computer: if you run Windows or an appropriate Linux/BSD on an Intel or AMD processor
- Pros: You have your own Vivado to use whenever you want and you never, ever have to share. It can also run pretty fast if you have a fast computer.
- Cons: You need to install it and it can take up a lot of space and it may not even be possible to install depending on your computer.
- Option 2: Use lab-bc: a new utility written by Jay Lang in 2022/23 as his MEng thesis which lets you build your stuff in the cloud1
- Pros: You avoid locally installing Vivado, saving space and time.
- Cons: I'd say it is slower, but the machines we're running this platform on are so damned performant, it is only about 20% worse.
- Option 3: Use lab machines to do stuff.
- Pros: You avoid all installations and don't have to figure out the very simple
lab-bcinfrastructure - Cons: There's only 17 machines and you have to share with other people and nobody likes to do that. When the lab deadline is one hour away, the notion that "sharing is caring" goes right down the toilet.
- Pros: You avoid all installations and don't have to figure out the very simple
We're split/tied on recommending either option 1 or option 2. We put quite a bit of work into option 2 so we have even some bias towards that. Otherwise, we recommend option 3.

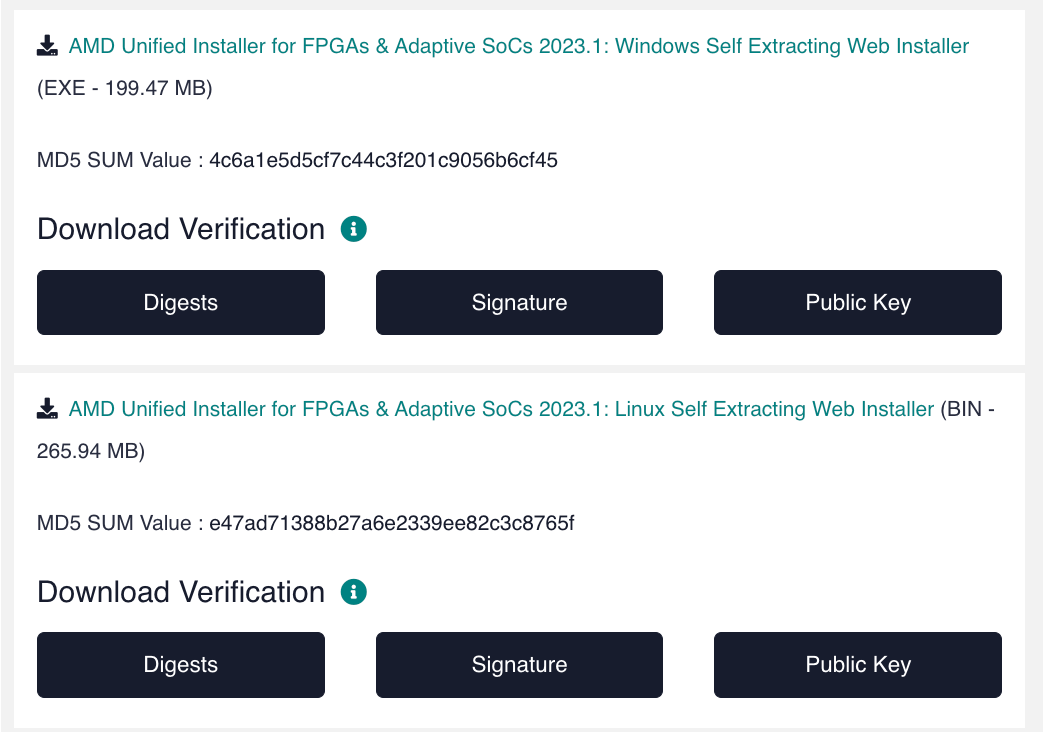
Once you've made an account with Xilinx if you don't have one already, you should be able to head over to their download page and grab a copy of the appropriate self-extracting web installer for your platform. You'll want 2023.1 - here's a picture of the right buttons to click.

sudo apt install -y libtinfo-dev libncurses-dev. On other distributions, your mileage may vary`Now that you've got the web installer, you can follow these excellent instructions from Digilent (the maker of our dev boards from last year) to finish the install. Skip their download instructions and start with "To launch the installer...". Work your way down through step 1, skip step two even if you're on Linux (openFPGALoader covers this for us), and then roll through step 3.
You should be good to go now! If this worked for you, you should now be able to launch Vivado from the command line. Running it without any additional options / stuff on the end should spin up the GUI - close it out once you see it, since we won't be using the GUI again.
export PATH=$PATH:/tools/Xilinx/Vivado/2023.1/bin to your shell's .rc file (e.g. if you use bash, which is the default, you should append this to your ~/.bashrc), and then restarting your terminal.On Windows, this is going to work slightly differently - you'll need to run /tools/Xilinx/Vivado/2023.1/settings.bat in your command prompt (or powershell) before you try and use Vivado. We'll update these instructions if there's a better way to do this -- we think there is, but we aren't sure yet.
Can't do a full install because you have a mac, or no hard disk space (or both, like me)? Don't want to use an ephemeral lab computer? You're in luck - we've engineered a way you can build your Verilog off your device transparently. You'll still need iVerilog and openFPGALoader and all those other tools, but you won't even need to think about installing Vivado.
To use lab-bc, make sure you have python3 and git installed on your machine. Any time you want to make a project, into your project folder (we'll use the same structure of folder regardless of your platform), you need to clone the remote client. This is as simple as:
git clone --recursive https://github.com/jaytlang/remote.git
Now, instead of running vivado as you might locally such as: vivado -mode batch -source build.tcl, you'll instead create a file called build.py that can usually look like this:
import os
import subprocess

vivado = "/opt/Xilinx/Vivado/2023.1/bin/vivado"

class VivadoBuildError(Exception): pass

if not os.access("build.tcl", os.R_OK):
	raise VivadoBuildError("you should pass a build script for us to run!")

print("starting vivado, please wait...")
proc = subprocess.Popen(f"{vivado} -mode batch -source build.tcl",
	shell=True, stdout=subprocess.PIPE, stderr=subprocess.STDOUT)

while True:
	line = proc.stdout.readline()
	if not line: break
	else: print(str(line.rstrip(), encoding='ascii'))

proc.wait()

if proc.returncode != 0:
  save("vivado.log")
  raise VivadoBuildError(f"vivado exited with code {proc.returncode}")
else:
  save("vivado.log")

#files to look for:
files = [ "final.bit",
          "post_synth_timing_summary.rpt",
          "post_synth_util.rpt",
          "post_synth_timing.rpt",
          "clock_util.rpt",
          "post_place_util.rpt",
          "post_place_timing_summary.rpt",
          "post_place_timing.rpt",
          "post_route_status.rpt",
          "post_route_timing_summary.rpt",
          "post_route_timing.rpt",
          "post_route_power.rpt",
          "post_imp_drc.rpt",
]

for file in files:
  # look for out.bit, because we've hard coded that for now i guess
  if not os.access(f"obj/{file}", os.R_OK):
	  raise VivadoBuildError(f"vivado exited successfully, but no {file} generated")
  save(f"obj/{file}")
And then from your project directory you can just run the following:
./remote/r.py build.py build.tcl {files you want to include explicitly}
What you get back from this will basically be what you'd get if you're running Vivado locally. It really is that simple. Kind of cool, yes?!
This last option uses the portion of lab computers that are available for anybody's use. These machines are all separate (not networked like on athena) so if you save a file on one, it is not going to show up on another machine. It is your responsibility to keep your files that you generate in a repository somewhere.
For these machines, your username is: MIT kerberos (all lowercase) and your password is your MIT ID number (all nine digits).
Only Computers 31 through 47 are available for in-lab usage. They have Ubuntu 22.04 LTS with Vivado + openFPGALoader + iVerilog + all the needed stuff installed, which is awesome. But AGAIN, you're going to be sharing these computers with other people, so we'd really encourage you to get the appropriate toolchains set up on your local laptop.
